This is the second of a two part post. If you missed part 1 you can find it here.
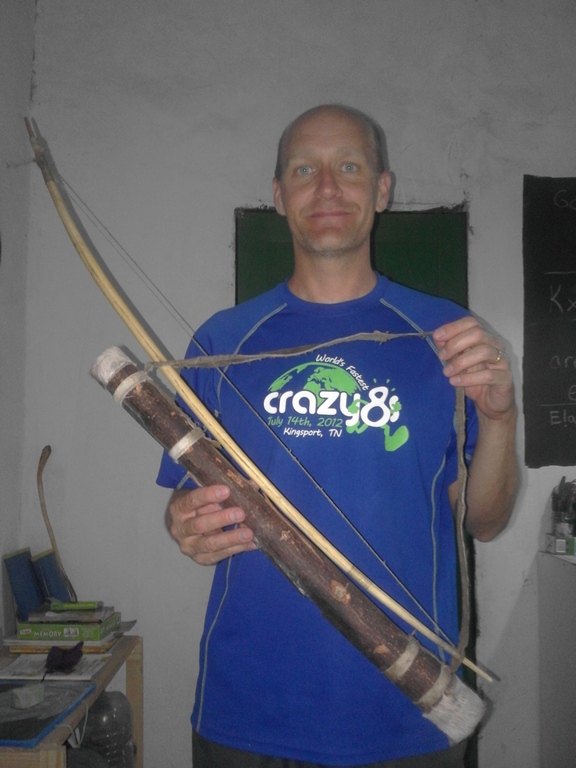
Just last week I was presented with the complete bow. It was such a great honor to have uncle present me the finished bow. I can now tell the complete story and show you pictures of the rest of the process.
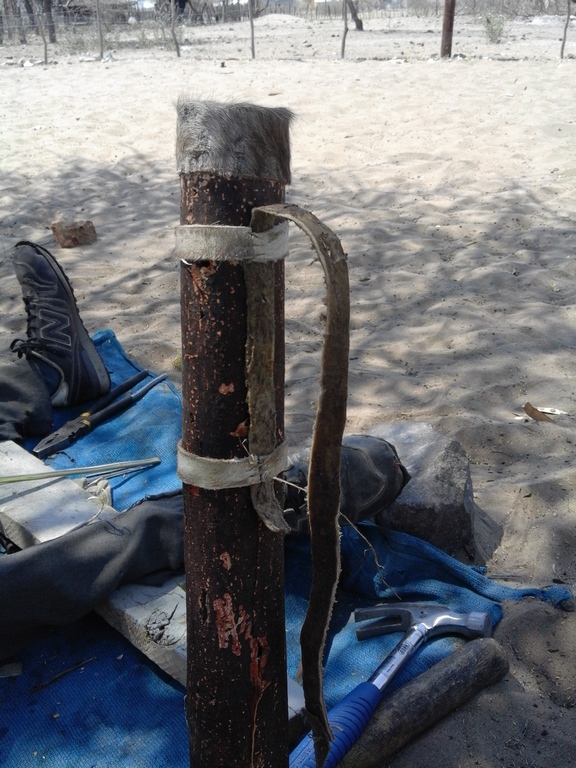
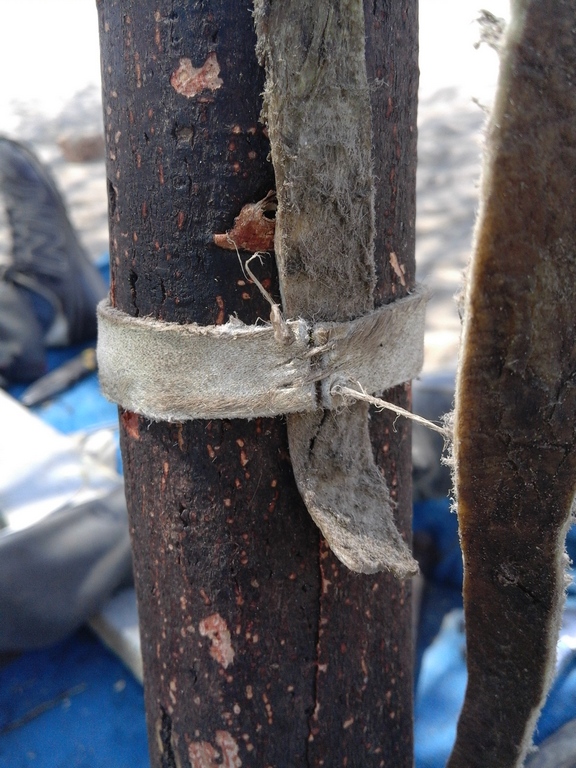
So were able to locate some kudu skin. Uncle took some of it while still fresh and put it over the end of the quiver to make the caps. He then let them dry for almost 2 weeks and below you can see he is prying the one end off as this is the removable cap.

He then worked the skin for about 2 weeks burying it in the sand keeping it moist. Every few days he would pull it out beat it and work it back it forth to loosen it up. He then cut it up into strips to make the straps and pieces we used to sew the straps on.
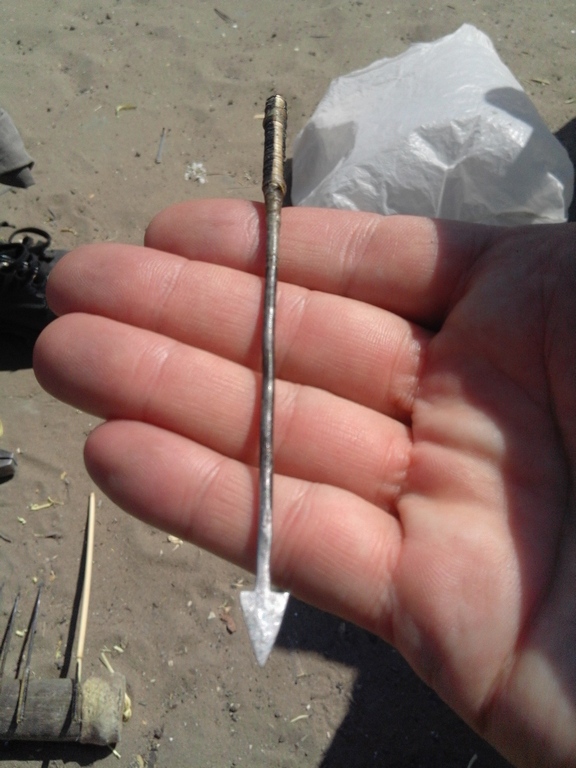
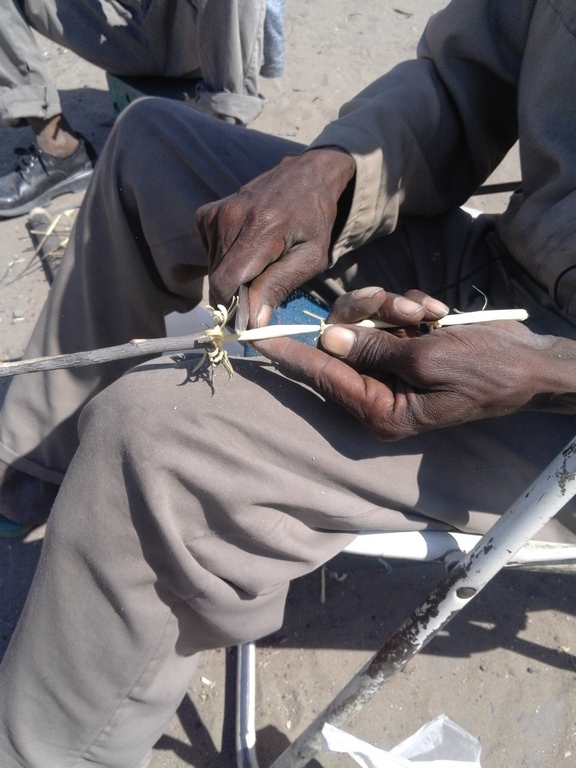
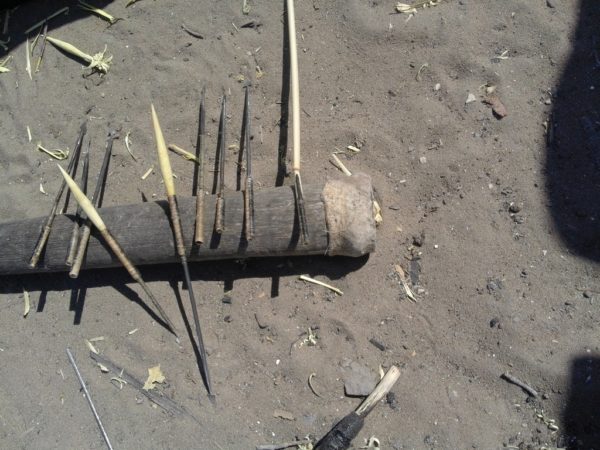
Now that the quiver was done and ready to hold the bow and arrows it was time to make the arrows. A typical bushman arrow consist of 4 parts. The metal arrow head and shaft, the hollow reed connector piece, the wooden connector piece and the arrow reed itself. The bushman use the animal ligament and wrap it around the end of the reeds to prevent cracking they also use what they call gum which is hardened tree sap as a glue to hold it together. You can see below the modern arrows are made from fence wire that is beaten and then filed down. The poison that is actually delivered on the arrow is applied just behind the arrowhead on the metal shaft. This poison is what slowly kills anything including humans. The wooden connector is hand carved.

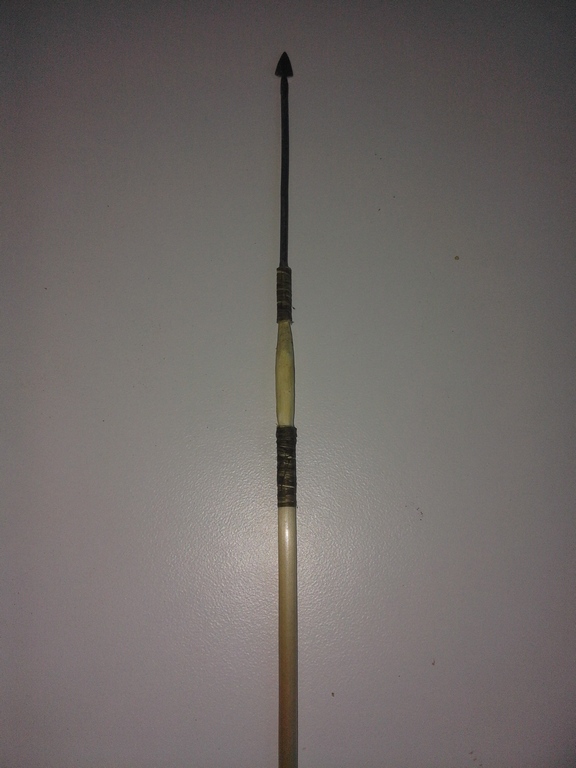
When it is all finished and done. You have the finished product. A bow and quiver and spare reeds and your ready to go. I could have said alot more but and if your interested ask me some questions as I really didn’t take alot of pictures but I did watch the whole process and I was also helping make my bow set at the same time. This truly was honor to presented this bow and to go with Uncle and have him teach me the whole way. The younger generation are losing the “old ways” it is sad. Now to learn how to shoot it and then to go get meat for everyone.